
Craft yourself better Craft Time!

When I get some time in to sew and design new things, I try to be as effective as I can with that time.  As you can imagine, being a new mom and keeper of the house of two large (translation lots of hair), cleaning tends to have a higher priority than crafting, LOL!  Here are some steps that I have found to help make the most of my crafting time!

Here is how my craft/sewing space looks when closed up and hidden from the rest of the world.


And the chaos of creating ~

... Did you really think I would let you see how messing I am when creating?

Anyways...  As you can see, I have a fairly compact set-up going on here, and taking stuff out and putting stuff back can eat up precious time that could be spent creating.

One way to cut down on that time waster is to work in stages.  Cut several sets of fabric to make one item, and then cut more fabric sets for another item.  Iron them in an assembly line type fashion, and then store them so that I can pull them out quickly to sew or load into the embroidery machine as I snatch a moment here or there for crafting.


I can also save time by cutting out the inner pieces for the different projects at one time too.  By cutting this batting in a strip the width I need to insert into the Keyfobs, I can then pack away the rest of the batting protecting it from getting anything stuck to it, and I keep the strip of batting with the Keyfobs pieces reading for the next time I can get the embroidery machine in action.


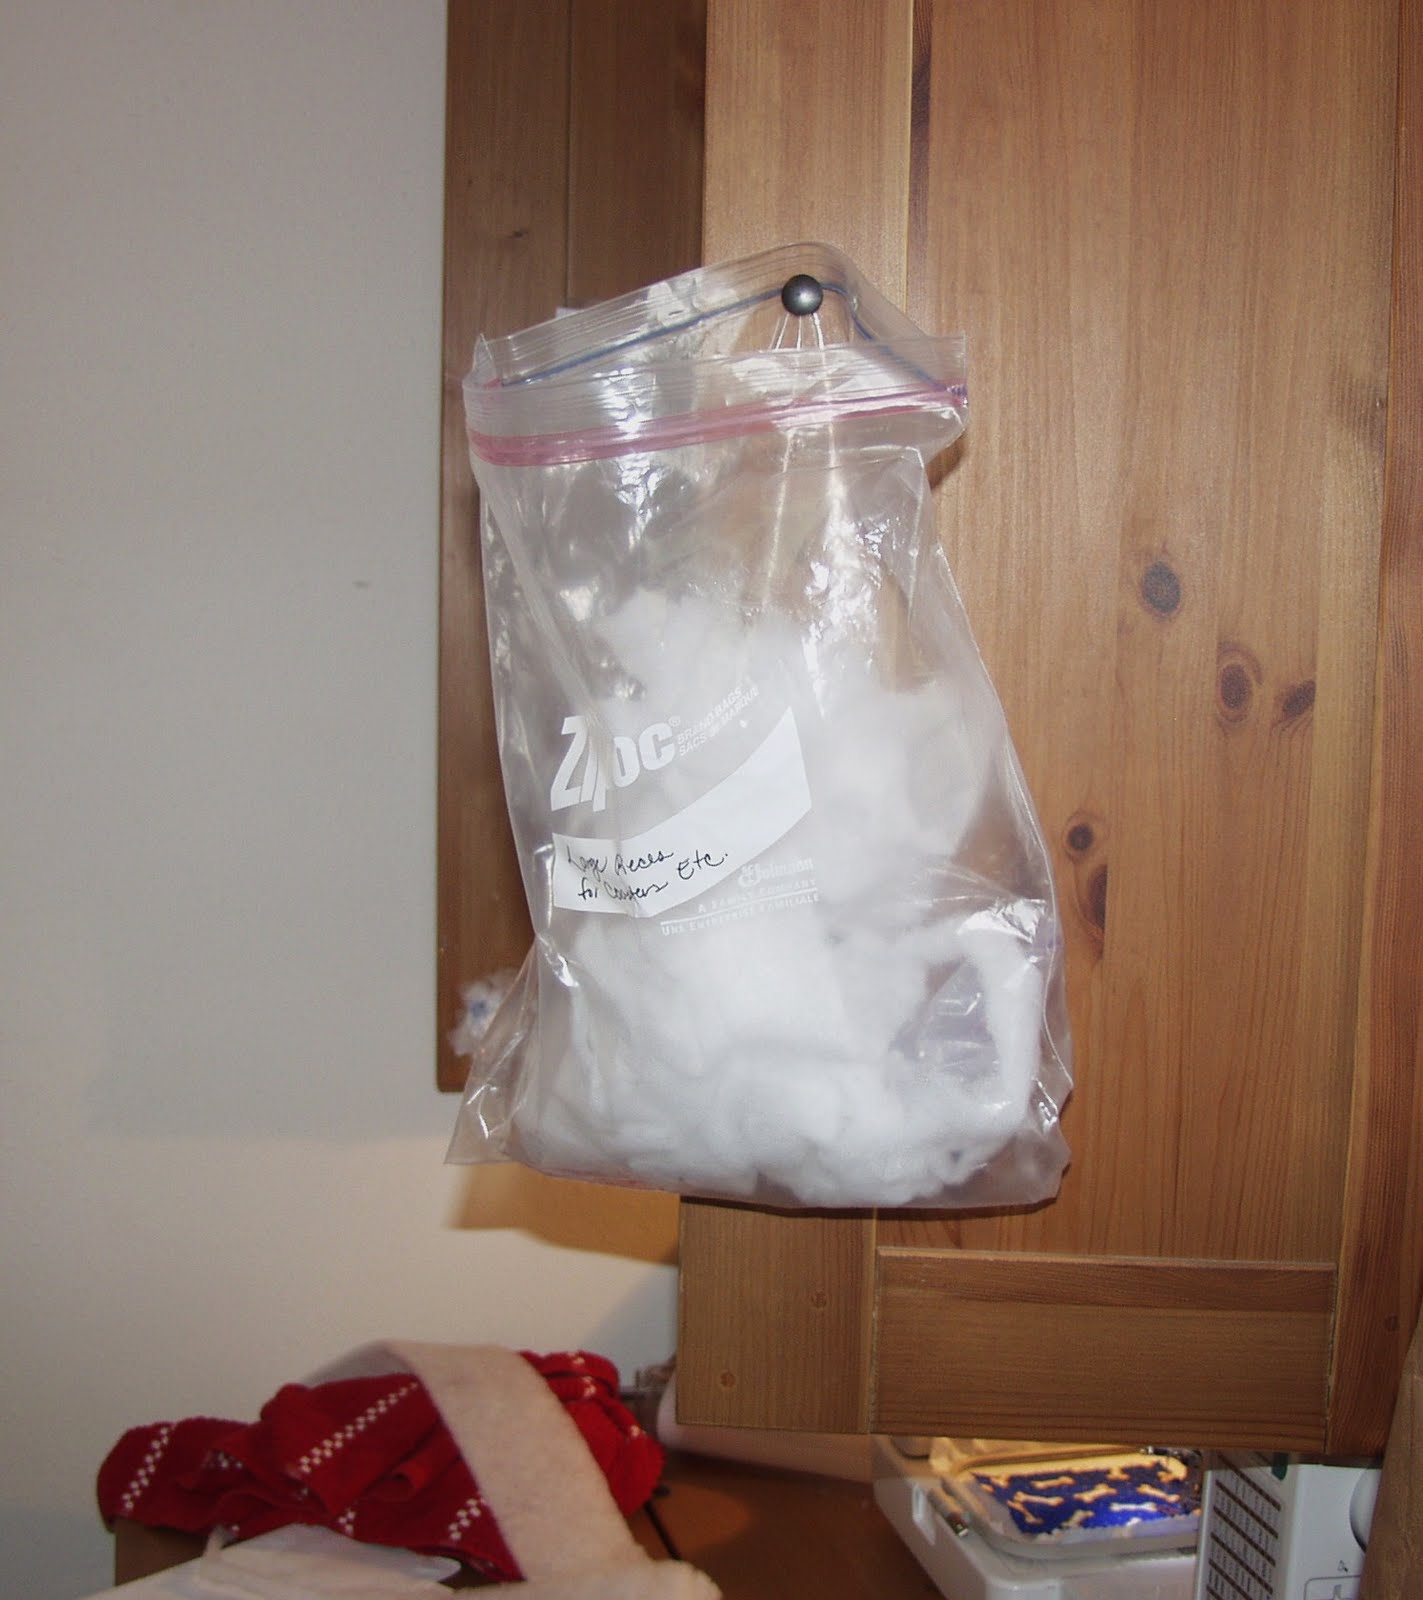
I have also set-up a scrap batting bag that I can easily hook to the knob of the hutch.  Keeping it from being in the way of the sewing machine, but still very easy to stick the miscellaneous pieces of batting into it.  When crafting time is done just squish and seal the bag, and stick it where ever it will fit in the hutch.


Here is a picture of the Keyfob assembly process.


I keep all the various items needed in a cube top.  Making them easy to find and grab in a minute.  This also makes them easy to put up quickly without worrying about misplacing something.  Not being able to find something quickly will eat up your crafting time in a hurry.
 

And there you have it.  Just a few things you can do to make the most of your crafting time.

Now go make something!

Comments

  1. Thank you for checking out my Halloween Rag Wreath at A Little Bit of Everything! Great organizational tips. I need to figure out another way to store all my fabric.

    ReplyDelete

Post a Comment

Thank you for taking the time to read this post. I love reading your comments, and enjoy returning the favor {even if it takes me a while to return it, LOL!}.

Popular posts from this blog

Pretty in Pink and Some Sparkles too!

A hat for my oldest in ballet pink (red heart yarn she picked) with some silver beads.  No pattern, and ended up running elastic thread through a couple rows to make it more secure on her head for now, until she grows into it some more. Matches a shoulder shrug knitted for her during her year of ballet lessons.

Lucky Leprechaun Giveaway Hop 2011

This Giveaway is closed: Winner announced 3/21/2011 The Lucky Leprechaun Giveaway Hop starts March 17th and ends on March 20th {Sunday}.  Enter over 200 giveaways by checking out the linky list below.  Wow! Over 200 things you can enter! The Spunky Diva is giving away a copy of each of the following books: {these are copies I received to review, so they have been read through once}   City on Our Knees by Toby Mac     My review.     See my review here. TO ENTER: (open to residents of the US and Canada) 1)  Leave a comment (make sure you leave contact e-mail) 2) Optional Entry: Follow through Google Friend Connect (GFC) and leave a 2nd comment. That's it!  Now leave your comments and go do some giveaway hopping!  I look forward to visiting you back ~

Add a ‘click-able’ signature to comments you make.

While blog hopping recently, I came across this fantastic tip listed on Be Our Best .  Jill has compiled her Top 10 Blogging Tips in one place to help others out there in blogland.  Most of them I had heard of before.  But she had one on her list that I have only seen a couple times in practice, and have not heard a how-to do it before. Number 6: Add a clickable signature to your comments. If you add the following text to the bottom of the comments you leave for other bloggers, whatever text you insert for “Your Text Here” will be clickable.  You have to switch out “{“ and “}” with “<” and “>” then it will work.  Remember to also change the “Your Blog Address” part, LOL! {a href=http://www.YourBlogAddress.com/ }YOUR TEXT HERE {/a} Bonus Tip ~ I use Notepad to store all the html codes I use on a regular basis {the direct link code for my signature image, color codes, etc.}.  I added the above code to my Notepad page, edited it with my information, and saved it.  Now all I